Content Restriction: Introduction
Some pages may be designed for a specific audience (such as having a membership site). Due to this, Groundhogg provides the functionality to stop users from viewing certain pages.
In order to do this, you can download Groundhogg's Content Restriction plugin from our official website either as part of Plus (or above) plan or separate extension.
Create or open a page for edit. We will walk through the process of Content Restriction:
- If you are using the WordPress default editor you will be looking underneath the page, after your content (If you are using Elementor or another page builder you will need to set these permissions from the default page editor/settings section.)
- Scroll down until you find the Content Restriction Tab:
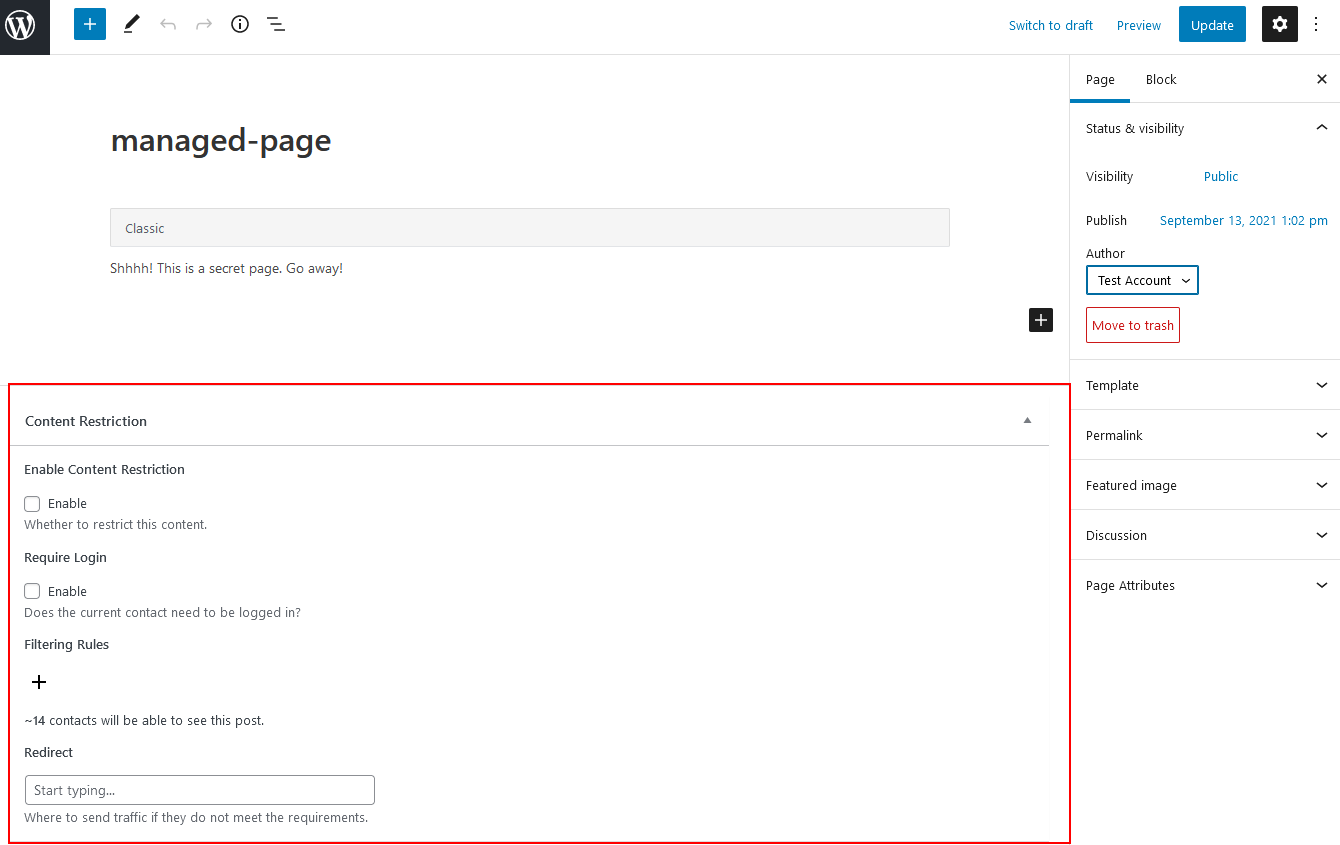
- Make sure the Content Restriction Section is filled out correctly

1. You must have the Enable Content Restriction box checked
2. You are not required to check the box #2, the restriction is controlled by tags listed in #3
3. Select the tags that must be applied to contact before they are able to see the hidden content. You could create a tag for membership levels and show content based on the levels tag
4. If you use more than one tag, you need to decide if all tags must apply before the content is shown or if any tag applied allows them to view the content.
5. You need to place the URL which you would like for visitors who are not allowed to see the content will go to.
Anyone IN these filters will see the content
Administrators bypass the content restriction
You can also use this plugin to check whether a user is logged in or not.
Note: Groundhogg uses the tracking cookie or contact details for this operation. So, if you are checking for a specific tag the user's cookies need to be set.